반응형
1. 스프링 프로젝트 생성 (스프링 부트 기반)
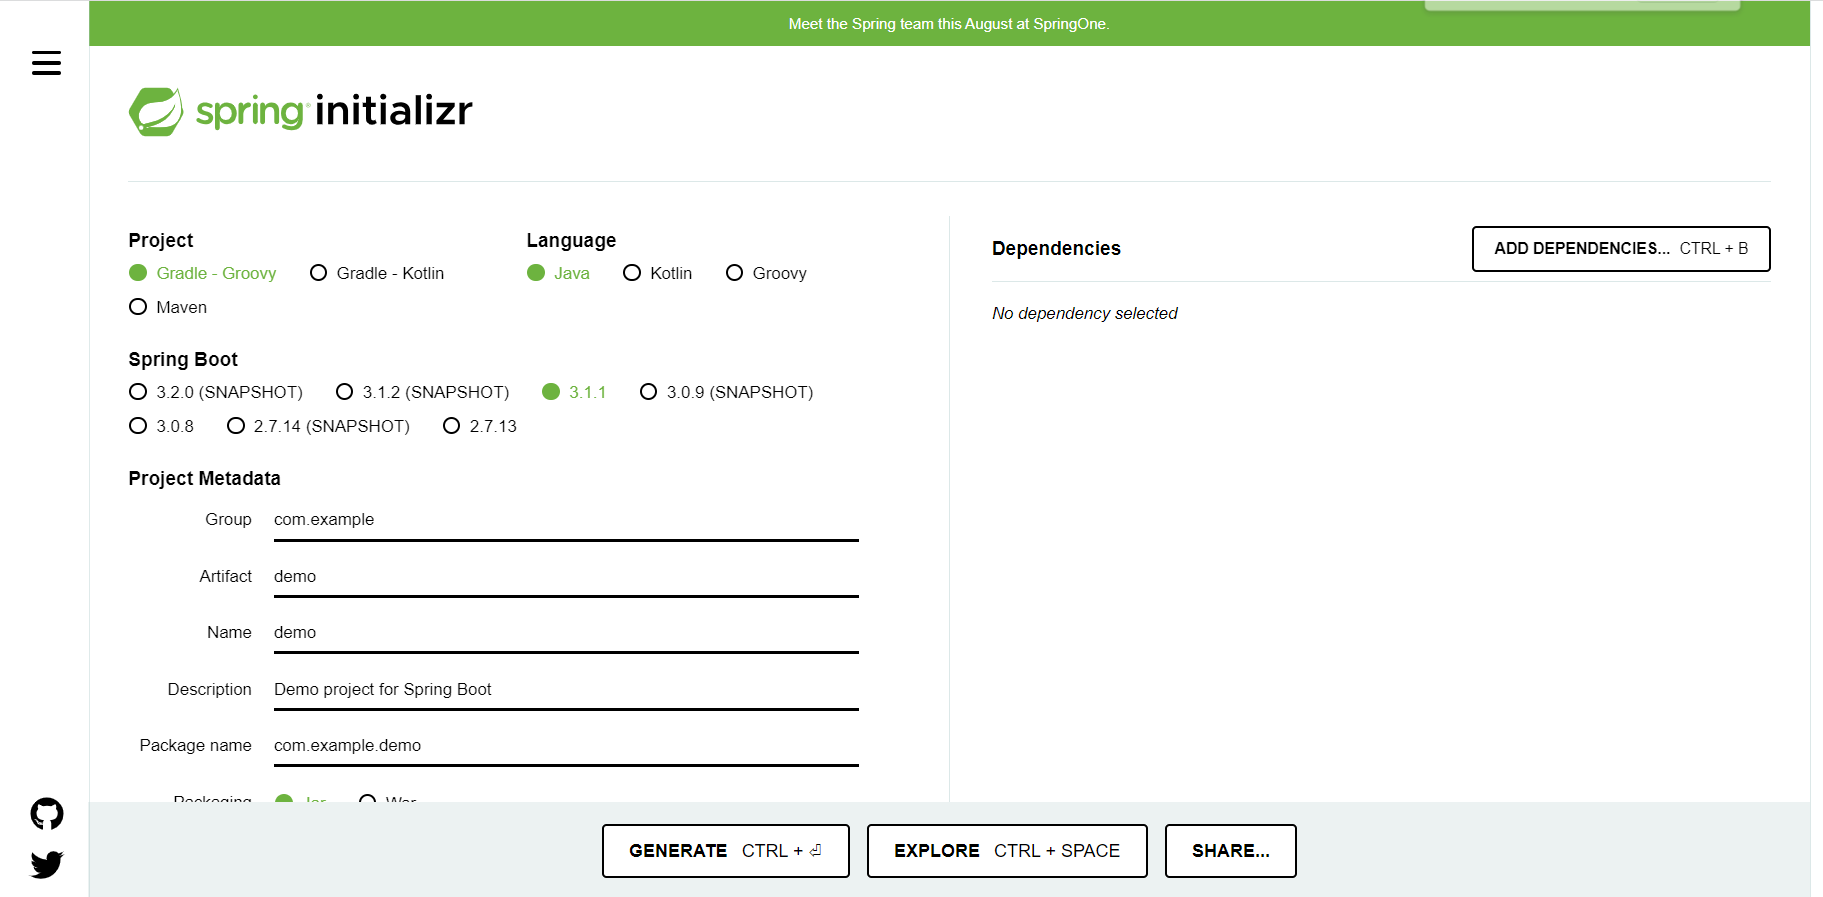
→ 요즘은 Gradle을 많이 씀.
→ Group에는 기업의 도메인을 씀
→ artifact : 프로젝트명?
→ dependency : 어떤 라이브러리를 땡겨 쓸건지
- thymeleaf, Spring Web 사용!
위와 같이 설정 후 Generate → IntelliJ 프로젝트 폴더에 압축 해제하면 프로젝트 생성 완료!
- main → java & resources(자바 파일 제외 모든것 → HTML, …)
- build.gradle → 설정파일.
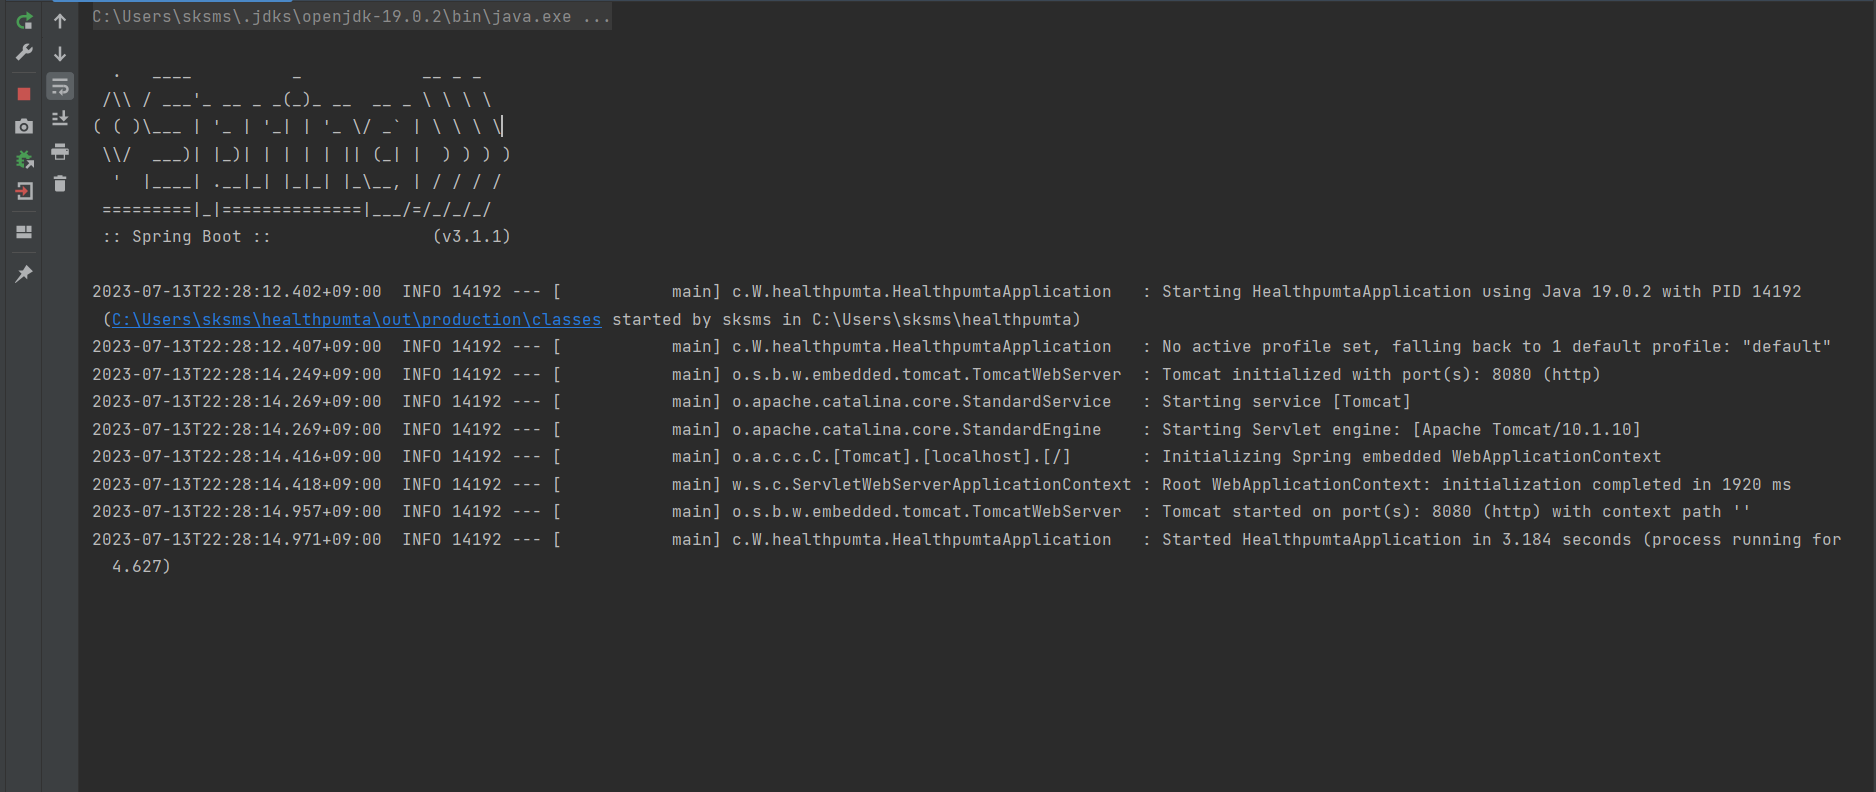
- main 실행 시 Tomcat 어쩌구에 뜨는 포트 번호를 웹페이지에서 입력해보기
localhost:8080
→ gradle 말고 intellij에서 직접 실행하고 싶으면
setting → gradle → gradle을 intellij로!
라이브러리
gradle은 의존 관계가 있는 라이브러리를 함께 다운로드 함.
- spring-boot-starter-web
- spring-boot-starter-tomcat : 톰캣(웹서버)
- spring-webmvc : 스프링 웹 mvc
- spring-boot-starter-thymeleaf : 타임리프 템플릿 엔진(View)
- spring-boot-starter(공통) : 스프링 부트 + 스프링 코어 + 로깅
- spring-boot
- spring-core
- spring-boot-starter-logging
- logback, slf4j
- spring-boot
출력할 때 sout으로 하면 안되고 log로 해야됨.
기록이 남음!
“테스트 라이브러리”
- spring-boot-starter-test
- junit : 테스트 프레임워크
- mockito : 목 라이브러리
- assertj : 테스트 코드를 좀 더 편하게 작성하게 도와주는 라이브러리
- spring-test : 스프링 통합 테스트 지원
참고
spring-boot-devtools 라이브러리 추가 시 html 파일 컴파일만 해주면 서버 재시작 없이 View 파일 변경이 가능하다.
→인텔리J : build → Recompile
View 환경설정
Welcome Page 만들기 (정적 페이지)
resources/static/index.html
<!doctype html>
<html lang="ko">
<head>
    <meta charset="UTF-8">
    <meta name="viewport"
          content="width=device-width, user-scalable=no, initial-scale=1.0, maximum-scale=1.0, minimum-scale=1.0">
    <meta http-equiv="Content-Type" content="text/html">
    <title>Document</title>
</head>
<body>
Hello
<a href="/hello">hello</a>
</body>
</html>
- 스프링 부트가 제공하는 Welcome Page 기능
- static/index.html을 올려두면 Welcome Page 기능을 제공한다.
- spring.io → Projects → Spring Boot → Learn → 내 버전의 Reference Docs → Spring Boot → Feature → Welcome Page
thymeleaf 템플릿 엔진
동적 페이지를 만들 수 있다.
(hello.hellospring 아래에 controller 프로젝트 만든 뒤 HelloController.java 생성)
package hello.hellospring.controller;

import org.springframework.stereotype.Controller;
import org.springframework.ui.Model;
import org.springframework.web.bind.annotation.GetMapping;

@Controller
public class HelloController {
    @GetMapping("hello")
    public String hello(Model model) {
        model.addAttribute("data", "hello!!");
        return "hello"; // 뷰 리졸버가 화면을 찾아서 처리함.
    }
}
웹 애플리케이션의 첫 번째 진입점 → controller라고 할 수 있다.
빌드하고 실행하기
- 콘솔로 이동
- cd 프로젝트 폴더
- ./gradlew build
→ 빌드가 됨
- cd build/libs
- ls -arlth 해서 빌드된 jar 파일 확인
- java -jar xxx.jar로 실행!
- ./gradlew clean → build 폴더가 사라짐.
- ./gradlew clean build → 완전히 지우고 다시 빌드함.
스프링 웹 개발 기초
1. 정적 컨텐츠
- 파일을 그대로 브라우저에 전달하는 방식.
- resouces/static에 아무 파일이나 넣는 것.
- 먼저 관련 컨트롤러를 찾아보고 없다면 정적 컨텐츠로 감.
<!DOCTYPE HTML>
  <html>
  <head>
      <title>static content</title>
      <meta http-equiv="Content-Type" content="text/html; charset=UTF-8" />
  </head>
<body>
정적 컨텐츠 입니다.
  </body>
  </html>
2. MVC와 템플릿 엔진
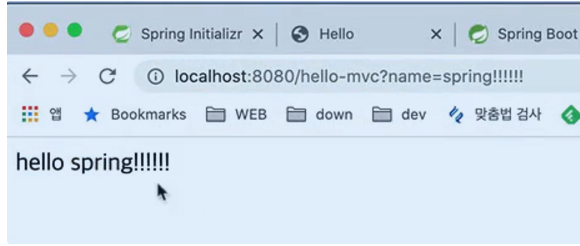
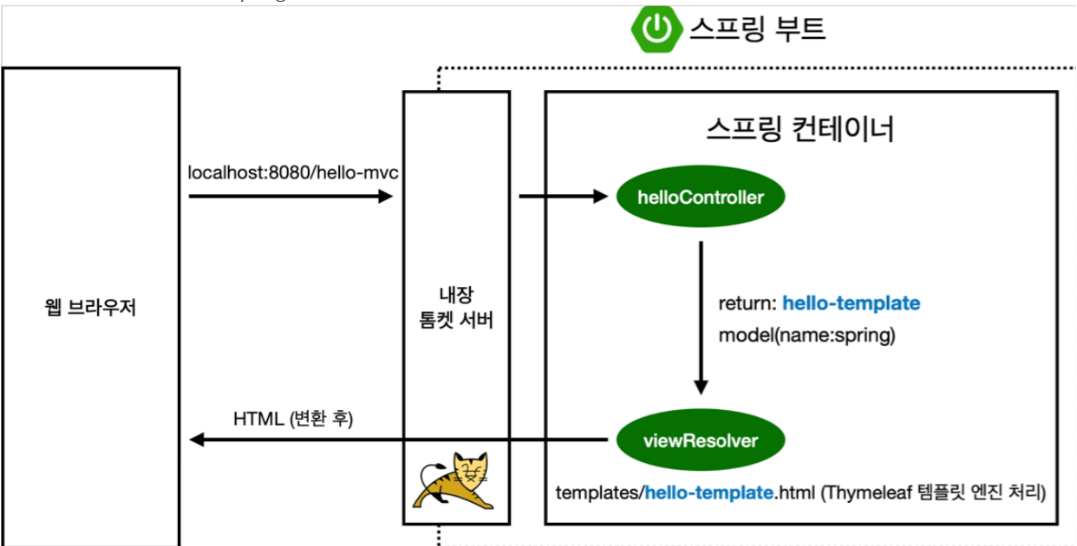
- MVC와 템플릿 엔진 → 서버에서 좀 바꿔서 전달하는 방식
- MVC : Model, View(화면 처리), Controller

* 결과
3. API
JSON으로 클라이언트에게 전달
- @ResponseBody를 사용하면 HTTP의 Body에 문자 내용을 직접 반환
@Controller
  public class HelloController {
      @GetMapping("hello-string")
      @ResponseBody
      public String helloString(@RequestParam("name") String name) {
          return "hello " + name;
      }
}- ResponseBody 객체 반환. (JSON)
@GetMapping("hello-api")
@ResponseBody
public Hello helloApi(@RequestParam("name") String name) {
    Hello hello = new Hello();
    hello.setName(name);
    return hello;
}
static class Hello {
   private String name;

   public String getName() {
	     return name;
   }

   public void setName(String name) {
       this.name = name;
   }
}
http://localhost:8080/hello-api?name=spring 을 통해 실행할 수 있다.
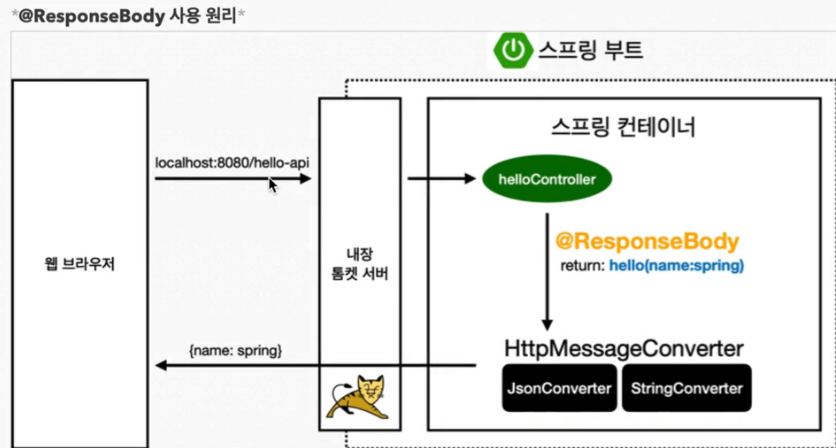
@ResponseBody 사용 원리
- HTTP의 BODY에 문자 내용을 직접 반환
- viewResolver 대신에 HttpMessageConverter 가 동작
- 기본 문자처리: StringHttpMessageConverter
- 기본 객체처리: MappingJackson2HttpMessageConverter
- byte 처리 등등 기타 여러 HttpMessageConverter가 기본으로 등록되어 있다.
반응형
'WINK-(Web & App) > Spring Boot 스터디' 카테고리의 다른 글
| [Spring Boot 스터디] 황현진 #1 주차 - 섹션 1, 2 "👋 🌸" (1) | 2023.07.14 |
|---|---|
| [Spring Boot 스터디] 이지원 #1 주차 - 섹션 1, 2 "Hello Spring" (0) | 2023.07.14 |
| [Spring Boot 스터디] 이정욱 #1주차 - 섹션 1, 2 ".... . .-.. .-.. ---" (0) | 2023.07.13 |
| [Spring Boot 스터디] 목진협 #1 주차 - 섹션 1, 2 "Hello Spring" (0) | 2023.07.13 |
| spring Boot 스터디 1주차 조현상 (0) | 2023.07.13 |

